Similarly, users can use the CTRL+X and CTRL+V key combination to move files between folders. However, what if I tell you that there’s an easier way to move files between folders on Windows 10/11? If you are someone who frequently copy or move files/folders from one location to another, you might like to add the ‘Copy to folder’ and ‘Move to folder’ shortcut in the context menu. Also read: How to Create Windows Tools Shortcut in Windows 10
Steps to Add ‘Copy To Folder’ & ‘Move To Folder’ on Context Menu
On both Windows 10 and Windows 11, you can add the ‘Copy to folder’ and ‘Move To Folder’ options in the context menu (Right-click menu). So, in this article, we will share a detailed guide on how to quickly copy/move items to different locations quickly.
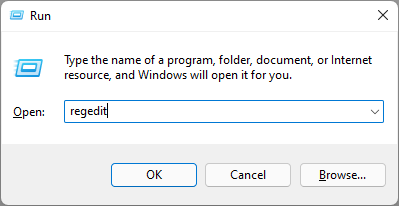
First of all, press Windows Key + R button on your keyboard. This will launch the Run dialog box.
On the Run dialog box, enter Regedit and hit the Enter button.
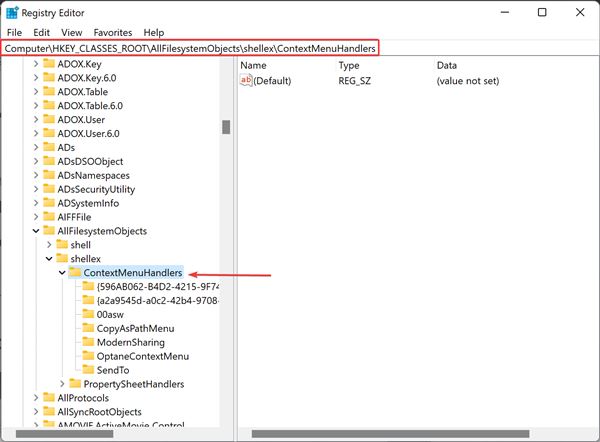
Now, you need to navigate to the following path – HKEY_CLASSES_ROOT\AllFilesystemObjects\shellex\ContextMenuHandlers
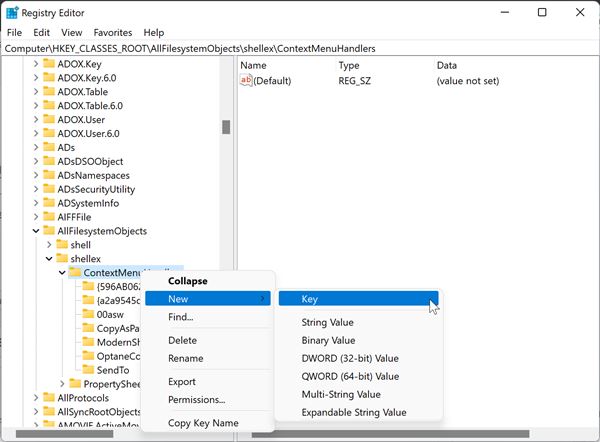
Right-click on the ContextMenuHandlers folder and select the New > Key option.
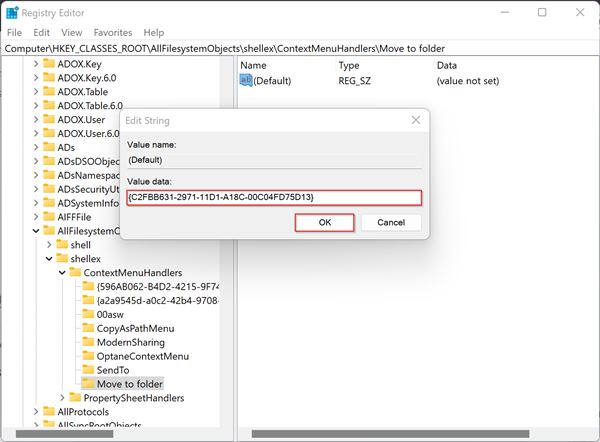
Name the new key Move to Folder.
On the Right pane, click on the (Default) string. Then, on the Value data, enter the following: {C2FBB631-2971-11D1-A18C-00C04FD75D13}
Now again navigate to the following path – HKEY_CLASSES_ROOT\AllFilesystemObjects\shellex\ContextMenuHandlers
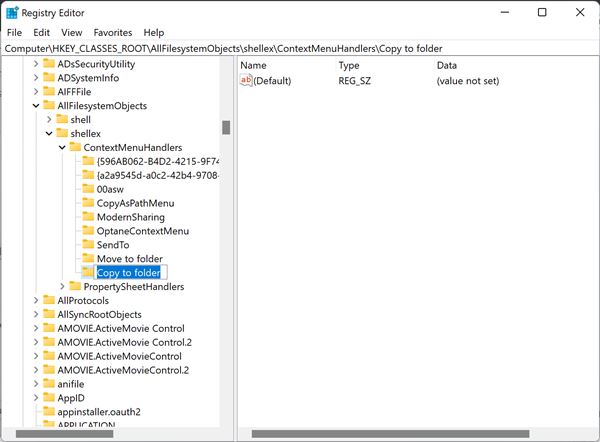
Right-click on the ContextMenuHandlers and select New > Key.
Name the new key Copy to folder
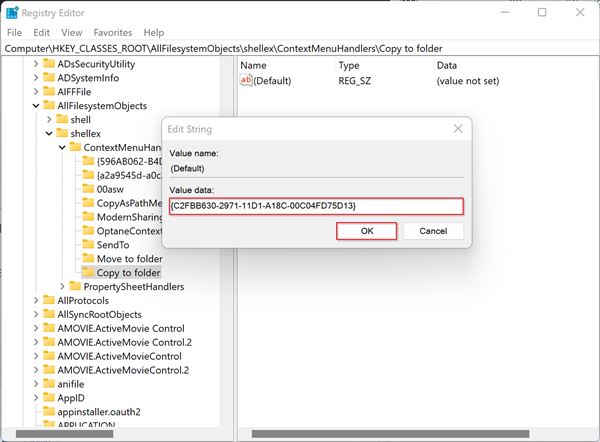
On the right pane, double click on the (Default) string and paste the following value in the Value data field: {C2FBB630-2971-11D1-A18C-00C04FD75D13}
That’s it! You are done. Now restart your computer. After the restart, you will find the Copy To folder and Move to folder option in the context menu. So, this guide is all about how to add copy to folder and move to folder option in the context menu. I hope this article helped you! Please share it with your friends also. If you have any doubts related to this, let us know in the comment box below.

