Even Windows 10 has a separate section that allows you to enable or disable features that you need. These are called Optional Features and are available through the Windows Features page in the Control Panel. So, in this article, we will discuss what optional features are and how to enable optional features on your system. Let’s check out.
What are Windows 10 Optional Features?
Windows 10 optional features were basically functionality that you can choose to enable if you wish. Some optional features were targeted more at power users and IT administrators, whereas others were meant for regular users. There’s no point in enabling these optional features until you know what you are doing. This is why Microsoft has chosen to keep it hidden from regular users. Also read: 10 Best PC Migration Software for Windows 10 (Cloning Software)
Steps to Add or Remove Optional Features in Windows 10
If you want to enable Windows 10 optional features, here are some of the simple steps to follow.
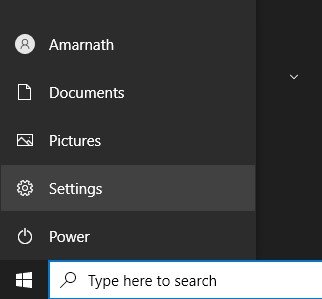
First of all, click on the Windows 10 Start button and select Settings.
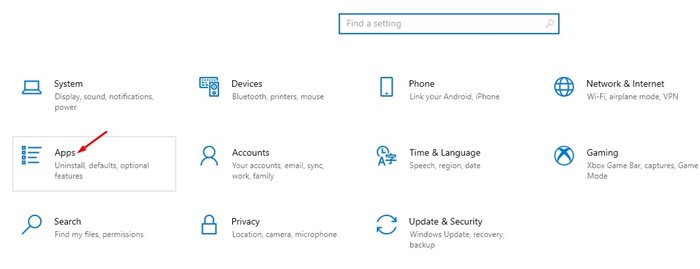
On the Settings page, click on the Apps option as shown below.
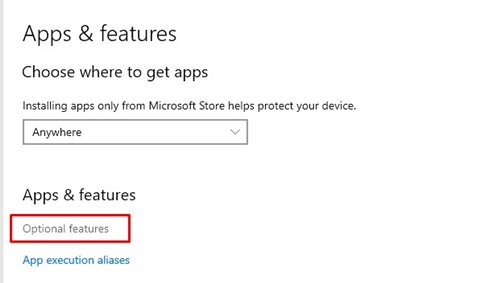
On the Apps option, click on the Optional Features.
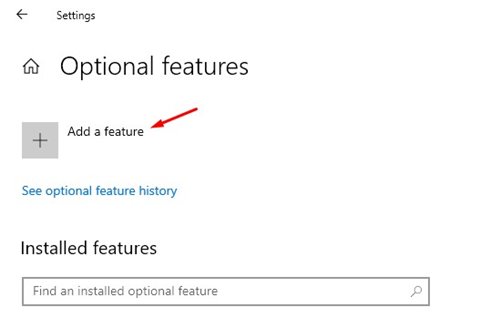
Now, you will see a list of all installed features. You can remove any if you wish.
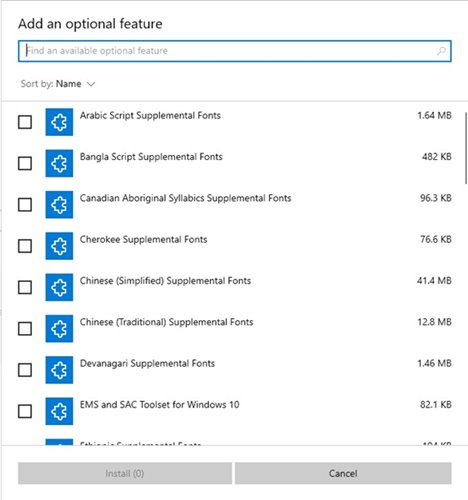
To add a new feature, click on the Add a feature button.
This will bring up a window where you need to check the box of any feature you want to install. When you are ready, click on the Install button again.
That’s it! You are done. This is how you can enable optional features in Windows 10. So, this guide is all about how to enable optional features in Windows 10. I hope this article helped you! Please share it with your friends also. If you have any doubts related to this, let us know in the comment box below.
