This is a new feature, but it’s very helpful for improving a device’s security. The feature makes it more difficult for anyone to access your device as you step away from your device.
Steps to Automatically Lock Windows PC Using Dynamic Lock
So, if you often step away from your PC and forget to lock it, Dynamic Lock is a feature you need. Below, we have shared a step-by-step guide on automatically locating Windows PC using Dynamic lock. Let’s check out.
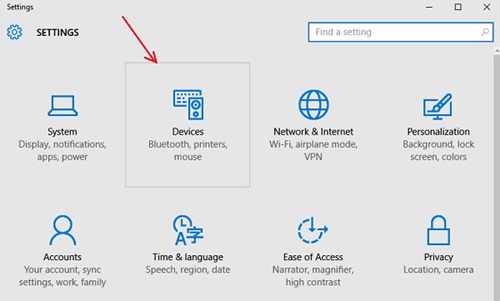
First, open your Windows 10 settings and click on Devices.
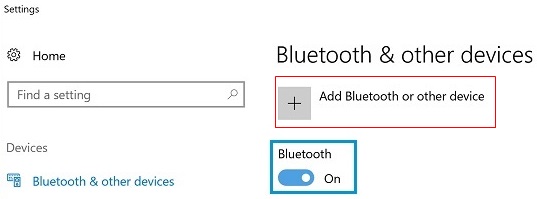
On the Devices, select the ‘Bluetooth & other devices‘ tab. Next, on the right side, turn on Bluetooth and click on Add Bluetooth or other device. Windows will search for your device, select the device through the results, and trigger the pairing action.
After pairing your Bluetooth device, you must enable the Dynamic Lock feature on Windows.
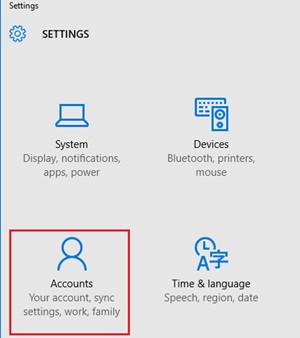
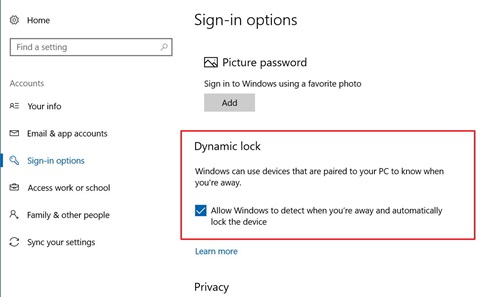
To enable the Dynamic Lock, go to Settings > Accounts > Sign in Options. Scroll down to the bottom, and check the “Allow Windows to detect when you’re away and automatically lock the device” option. Now Windows will detect the paired Bluetooth device every time. If it is away from the range for more than 30 seconds, Windows will automatically get locked!
Again, when the same paired Bluetooth device comes to the range, your device will be unlocked. So, these are some simple steps to automatically lock Windows PC using the Dynamic Lock feature. If you need more help setting up Dynamic lock in Windows, let us know in the comments below.