Each time you type something in the Windows File Explorer search box, you will see a list of recently searched items. The search functionality is built into the file explorer application, and it’s located at the top-right corner. The latest version of Windows – Windows 11 also keeps a history of the items you have searched. Although the feature is handy, some users might like to disable it. For example, if you have a shared computer/laptop, you won’t want others to see what you have searched in File explorer. In that case, it’s best to disable the File Explorer search history altogether. So, if you are using Windows 11 and looking for ways to disable the search history in File Explorer completely, you are reading the right article. Also read: How to Rename Your Windows 11 PC (2 Methods)
Steps to Disable File Explorer Search History in Windows 11
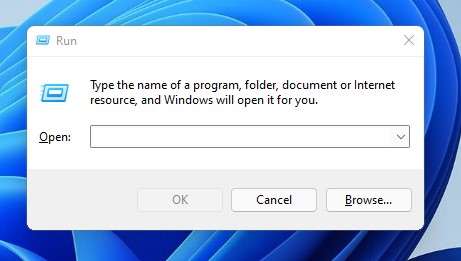
In this article, we will share a step-by-step guide on how to disable File Explorer Search History in Windows 11. Let’s check out. Step 1. First of all, press Windows Key + R on your computer. This will open the RUN dialog box.
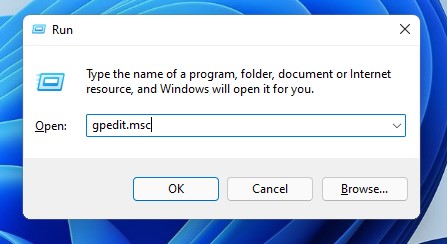
Step 2. On the RUN dialog box, enter ‘gpedit.msc’ and hit the Enter button.
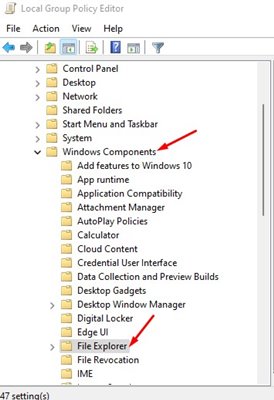
Step 3. This will open the Local Group Policy Editor. Navigate to the User Configuration > Administrative Templates > Windows Components > File Explorer.
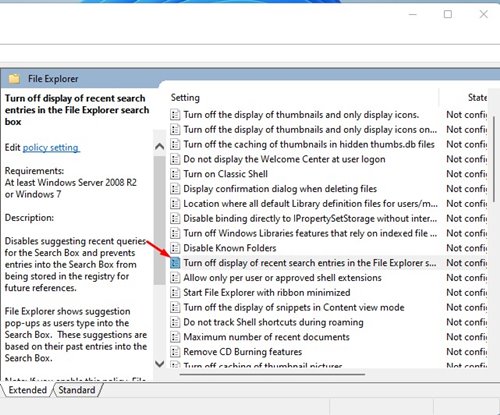
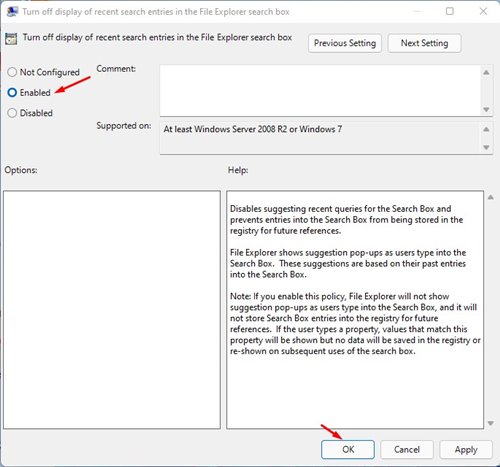
Step 4. On the right pane, find the option ‘Turn off the display of recent search entries in the File Explorer search box.’
Step 5. Double click on the policy. On the next Window, select ‘Enabled‘ and click on the ‘Ok’ button.
That’s it! You are done. This is how you can disable File Explorer search history in Windows 11. So, this guide is all about how to disable File Explorer Search History in Windows 11. I hope this article helped you! Please share it with your friends also. If you have any doubts related to this, let us know in the comment box below.
