However, there are times when we don’t want to go through the hassle of opening a professional photo editor to do some basic editing. Basic things like adjusting brightness, resizing images, etc., can be done without installing any photo editing tools. In this article, we will share a detailed guide on how to quickly resize multiple images in Windows 10 without using any photo editing software. Let’s check out.
Steps to Resize Multiple Images at Once in Windows 10
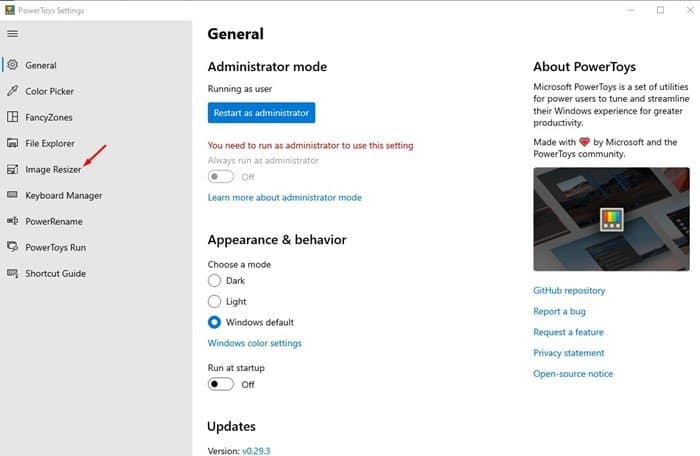
So, to resize multiple images in Windows 10, we are going to use PowerToys. If you don’t know about PowerToys, you need to check out this article – How to Download & Install PowerToys in Windows 10. PowerToys has a module known as ‘Image Resizer’ that lets you resize images to a pre-configured or custom size. Here’s how to use the Image Resizer module in PowerToys. Step 1. First of all, open PowerToys on Windows 10 computer. Step 2. On the left pane, click on the ‘Image Resizer’
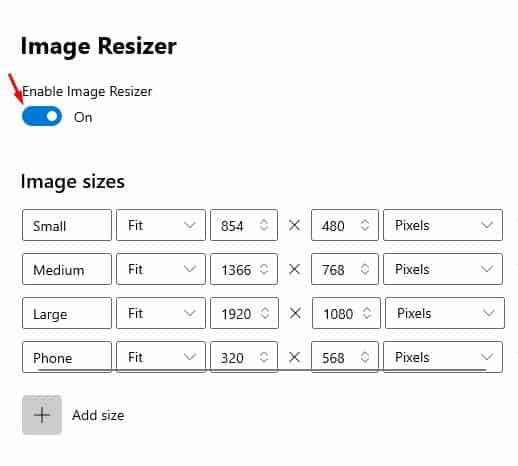
Step 3. On the right-hand side, enable the ‘Enable Image Resizer’ option.
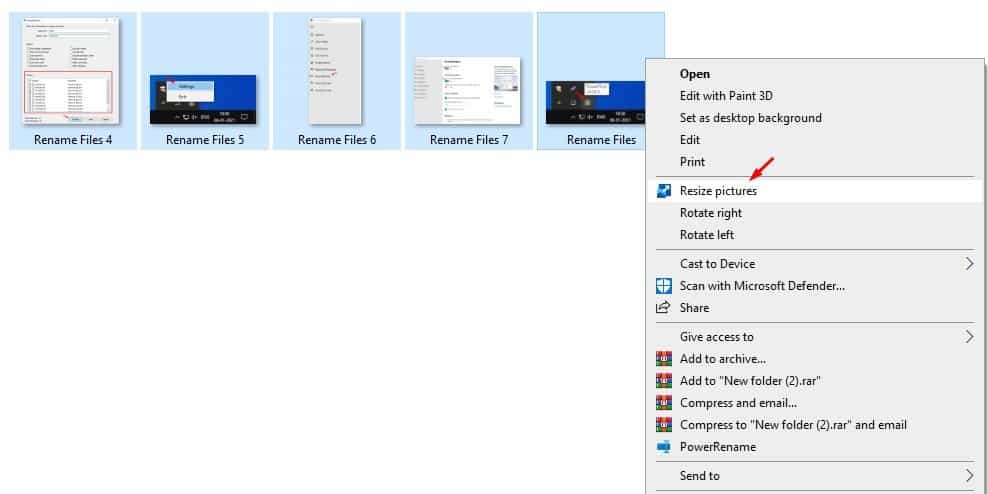
Step 4. Once done, select the images which you want to resize. Right-click on the pictures and choose the ‘Resize Pictures’ option.
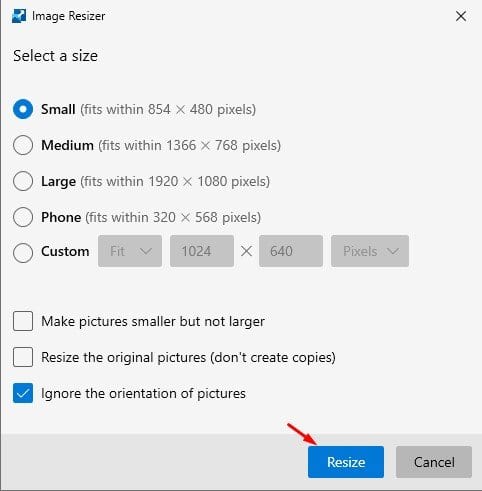
Step 5. Now you will see the Image Resizer utility. Select the image size and click on the ‘Resize’ button.
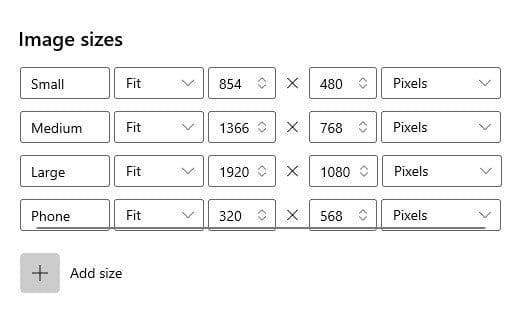
Step 6. You can even configure the image resizer settings. For that, open PowerToys, and select ‘Image Resizer’. On the right pane, find the option called ‘Image Sizes’. You can edit each of the included profile to add your own pre-defined custom size.
That’s it! You are done. This is how you can quickly resize multiple images on Windows 10 computer. So, this article is all about how to resize multiple images on Windows 10 operating system quickly. I hope this article helped you! Please share it with your friends also. If you have any doubts related to this, let us know in the comment box below.
