Microsoft has made lots of visual changes to the operating system. Also, some of the settings have been changed on Windows 11. For example, on your Windows 11 PC, you might have several different audio output devices such as speakers, headsets, headphones, and more. If you want to play audio from a specific device, you need to set it as default. Fortunately, Windows 11 allows you to select default speakers in easy steps. Hence in this article, we will share a detailed guide on how to select default speakers on Windows 11. Also read: How to Use Virtual Desktops On Windows 11
Steps to Set Default Audio Device on Windows 11
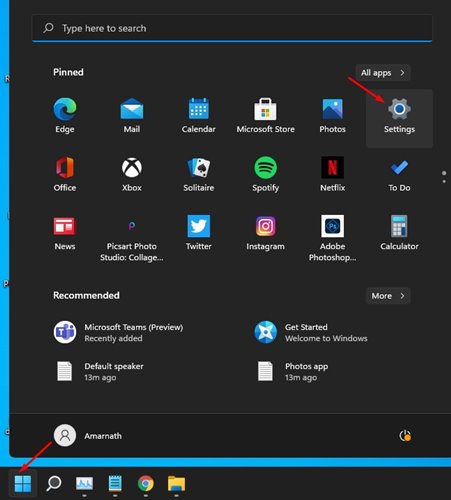
The process shared below is pretty easy to follow. You need to implement some of the simple steps given below. So, let’s check out how to select default speakers on Windows 10. Step 1. First of all, click on the Windows 11 start button and select ‘Settings.’
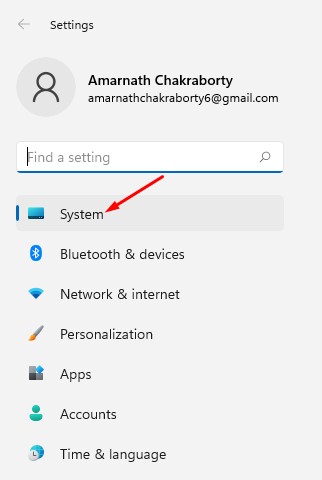
Step 2. On the Settings, click on the ‘System’ option as shown in the screenshot below.
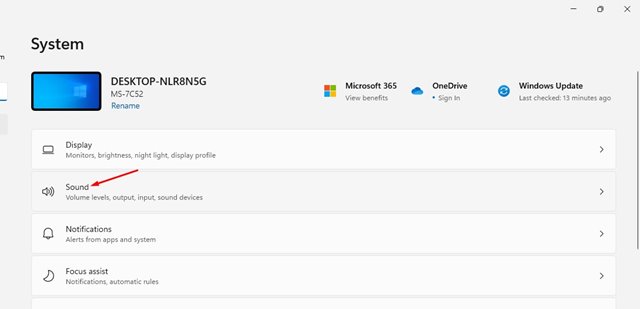
Step 3. On the System page, click on the ‘Sound’ option.
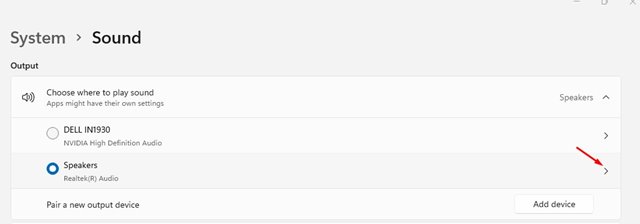
Step 4. The sound page will list all connected audio devices. Click on the arrow beside the audio output device you’d like to set as default.
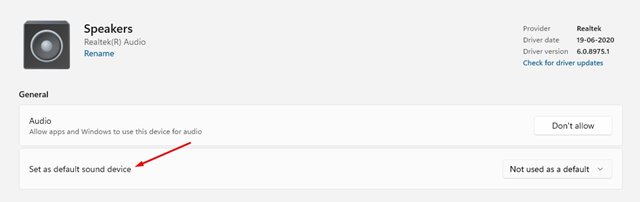
Step 5. On the Audio properties page, find the ‘Set as default sound device’ option.
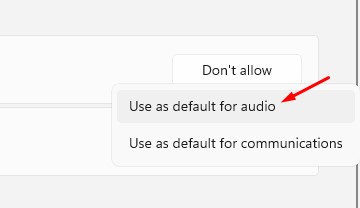
Step 6. Now click on the drop-down menu labeled ‘Not used as a default’ and select the ‘Use as default for audio’ option.
That’s it! You are done. This is how you can select default speakers on Windows 11. So, this guide is all about how to select default speakers on Windows 11. I hope this article helped you! Please share it with your friends also. If you have any doubts related to this, let us know in the comment box below.